Creating Form Templates
To create and modify form templates, you must be an Admin user, or you must have the Can manage form templates permission enabled in Staff Member settings.
To view form examples and download form templates, the following resources from the Mangomint blog are available:
Link copiedCreate a form templateLink copied
To create a form template, open the Forms app and select Manage templates > Add Form Template.
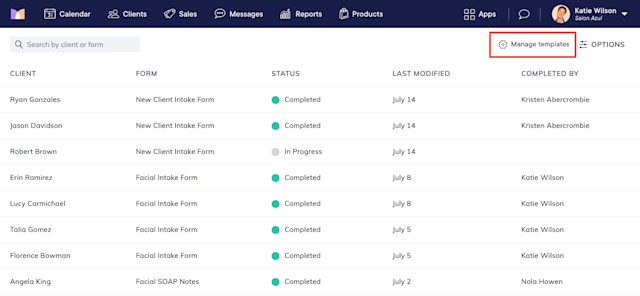
You can build and customize your form template using the Details, Form Fields, Preview, and Advanced tabs.
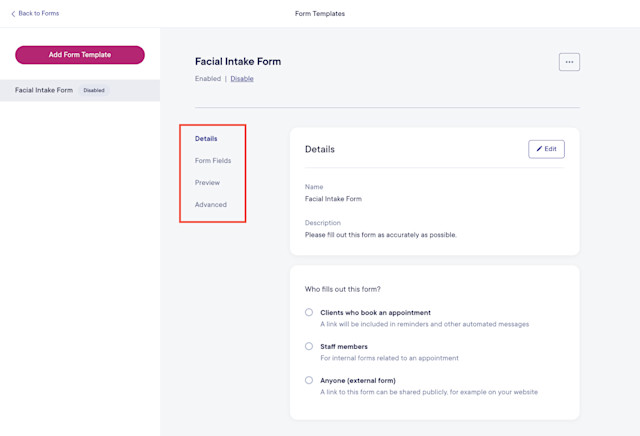
Link copiedDetails tabLink copied
In the Details tab, specify who should fill out the form, how often the form needs to be filled out, and which appointments should require the form.
Link copiedWho fills out this form?Link copied
Clients who book an appointment: Select this option for client forms, such as intake forms and waivers.
Staff members: Select this option for staff member forms, such as SOAP notes and treatment summaries.
Anyone (external form): Select this option for external forms, such as a form on your website for requesting appointments. When you select this option, a link to the form will be displayed. Anyone with this link can submit the form.
Link copiedHow often does it need to be filled out?Link copied
Every time they book an appointment/For every appointment: For client forms, select this option if the client needs to submit the form every time they book. This is useful for collecting information such as recent changes to allergies or medications. For staff member forms, select this option if the staff member needs to submit the form for every appointment.
Only once for each client: Select this option if the form only needs to be submitted once for each client.
Link copiedWhich appointments is it for?Link copied
Specify if the form should be submitted for all appointments or only for appointments with specific services. For example, for a client facial intake form, select Only for appointments with specific services and add the entire facials category or specific facial services.
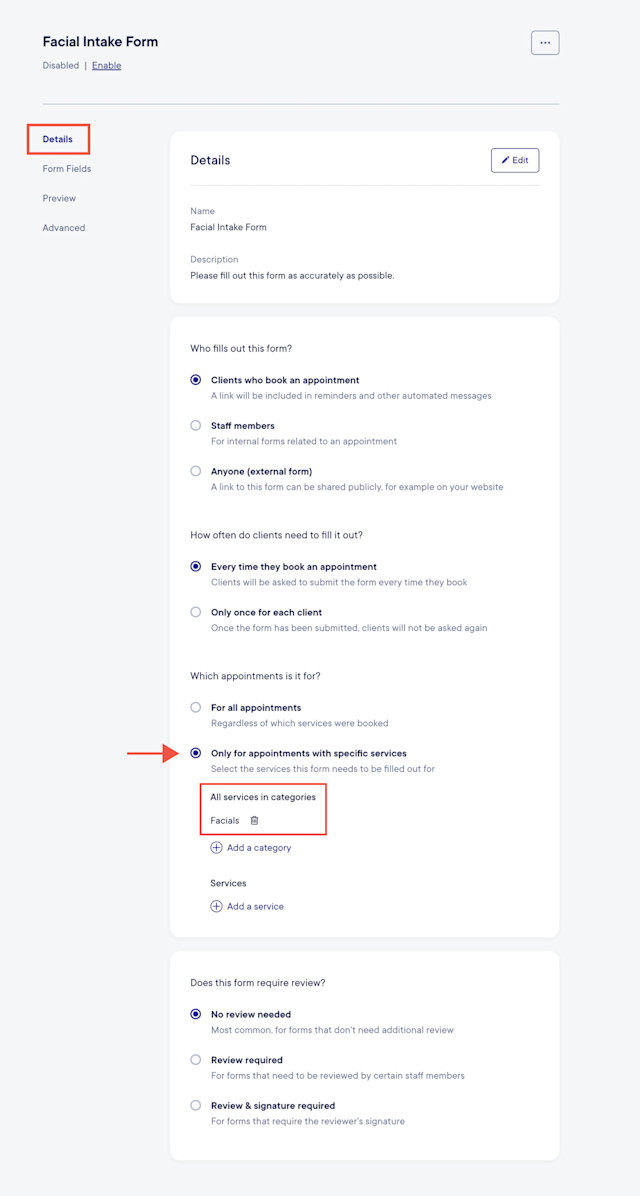
Link copiedDoes this form require review?Link copied
Specify if this form needs to be reviewed and approved once submitted. Learn more about this setting.
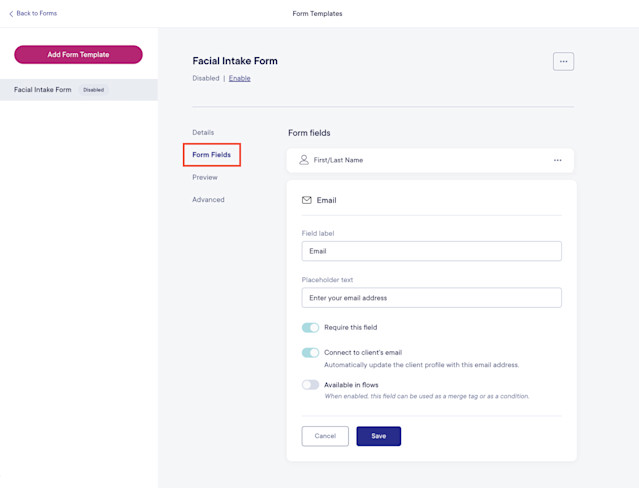
Link copiedForm Fields tabLink copied
In the Form Fields tab, build your form template using the available form fields.
First/Last Name field
If you add this field to the form template, the field will be pre-filled with the client's name when the form is requested. If the client's name is updated on the form, the client profile will also be updated.
This field includes an Ask for pronouns toggle that you can enable to ask the client for their pronouns. If the client adds their pronouns to the form, their client profile will also be updated.
Email, Phone Number, and Birthday fields
If you add these fields to the form template, the fields will be pre-filled with the client's information if the Connect to client’s email/phone number/birthday toggle is enabled. If the toggle is enabled and the field is updated on the form, the client profile will also be updated.
The Available in flows toggle is also available for specific form fields. Learn more about using this toggle.
Link copiedPreview tabLink copied
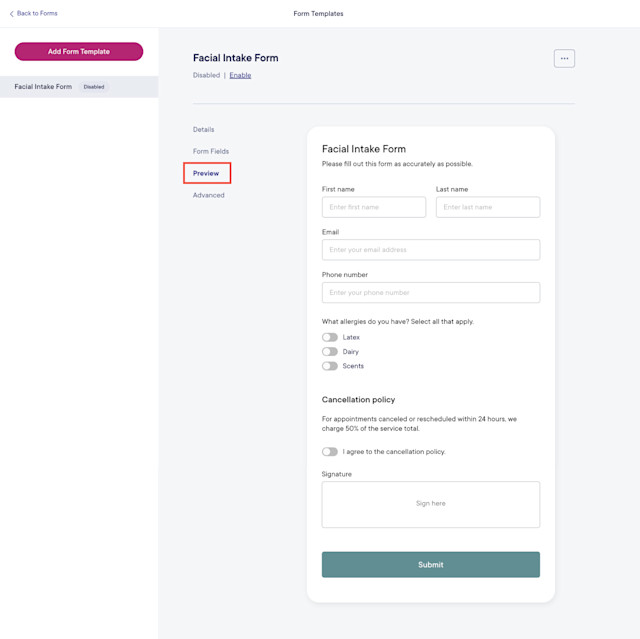
In the Preview tab, you can see what the form will look like when enabled.
Link copiedAdvanced tabLink copied
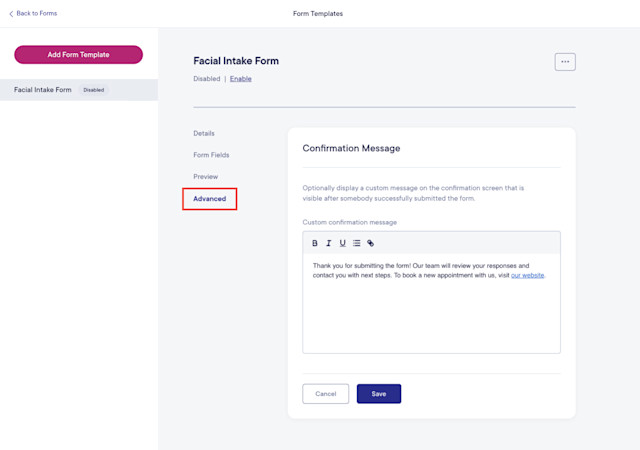
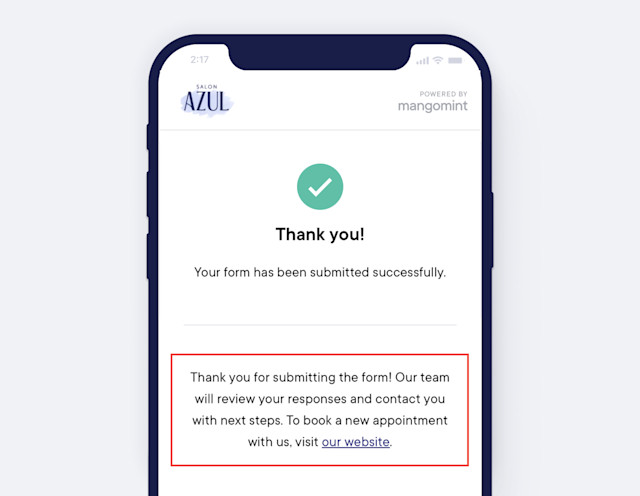
In the Advanced tab, you can add a custom message that will display on the confirmation screen when a client or external form is submitted. You can use the hyperlink button to add a link to the message.
Once you've finished creating your form template, you can enable it.
Staff member forms will be located in the appointment details for staff members to complete.
Once a form template is enabled, you can also manually add the form to an existing appointment.

Can't find what you're looking for?
with us to talk to a real person and get your questions answered, or browse our on-demand videos.