Creating Waivers in WaiverForever
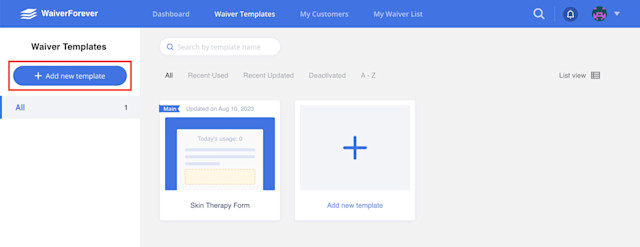
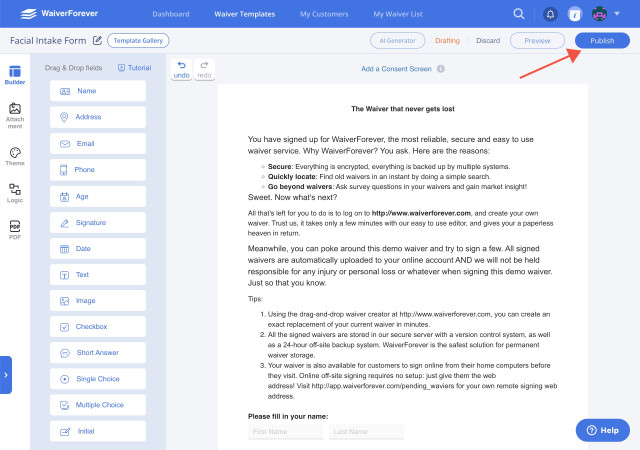
To create a waiver in WaiverForever, go to the Waiver Templates screen and click Add new template.
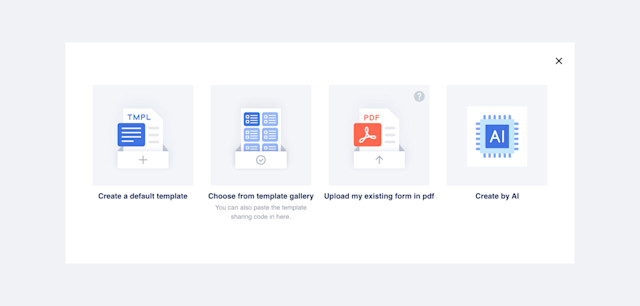
Enter a name for the template and click Next. Click Create a default template. If you have an existing PDF form, you can use the Upload my existing form in pdf option.
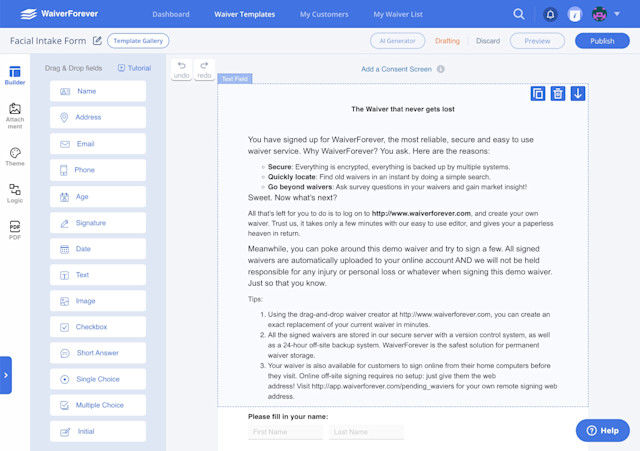
Customize the template as needed.
Add the following required fields to the template. Make sure the This is an optional field box is unchecked for these fields.
Name
Signature
Email address and/or phone number
When clients complete a waiver, it’s important that they use the same email address/phone number that’s on file in Mangomint to successfully sync the completed waiver to their client profile.
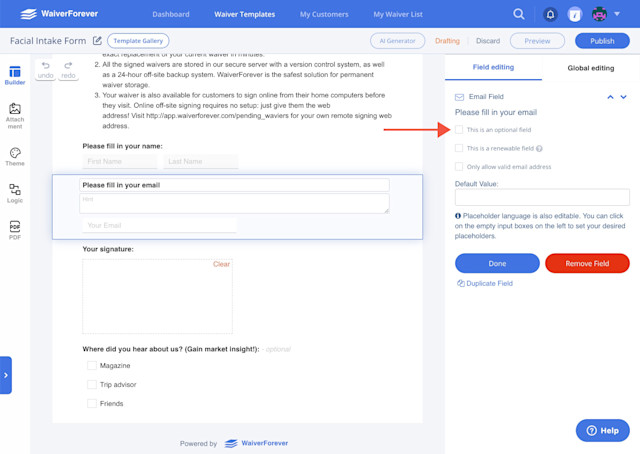
When you're done customizing the template, click Publish.
Link copiedSetting waivers to be automatically processed and approvedLink copied
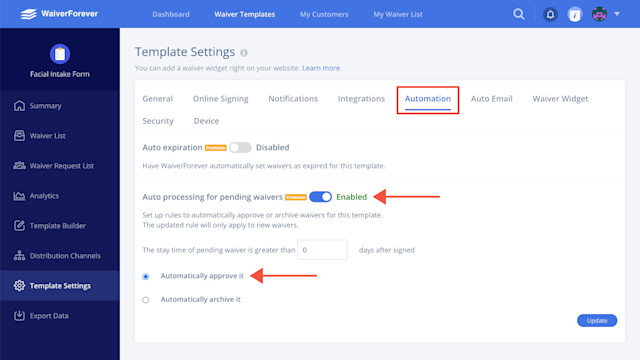
You will need to set your waivers to be automatically processed and approved. This allows completed waivers to be automatically synced to client profiles in Mangomint.
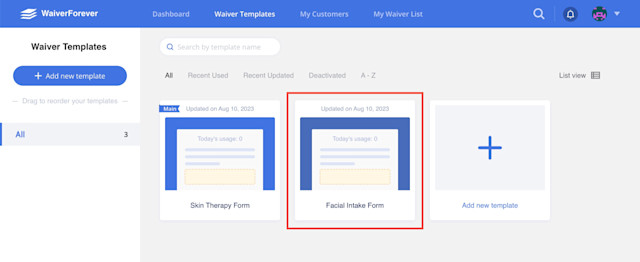
In WaiverForever, go to the Waiver Templates screen and select the waiver to update.
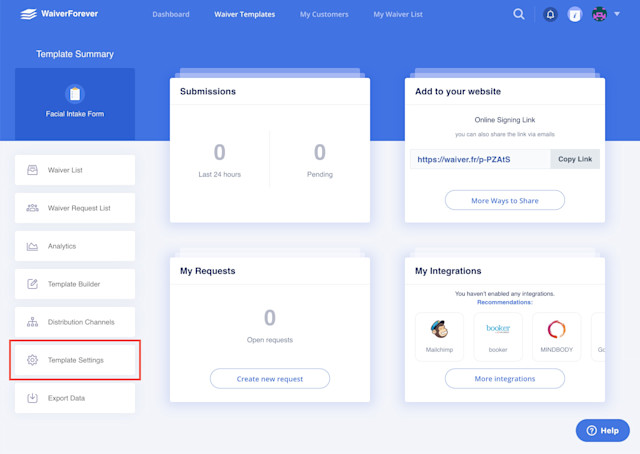
Click Template Settings.
Click the Automation tab. Enable Auto processing for pending waivers and select Automatically approve it.

Can't find what you're looking for?
with us to talk to a real person and get your questions answered, or browse our on-demand videos.