Enabling and Disabling Automated Messages
You can enable (add) and disable (delete) automated messages to fit your business needs.
You can also:
Use multiple phone numbers for your automated text messages if you have multiple locations
Link copiedEnabling automated messagesLink copied
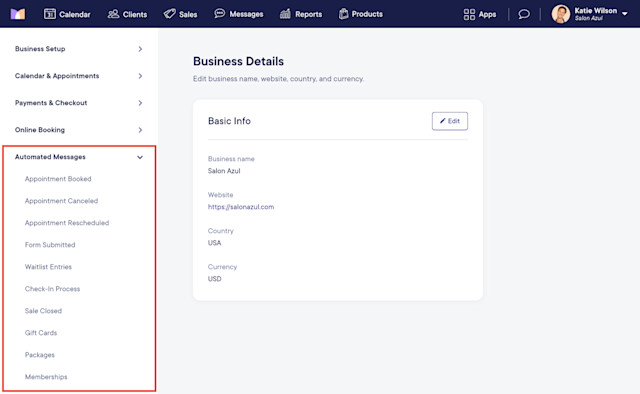
To enable (add) an automated message, open the Settings app and select Automated Messages.
Select the automated message category (Appointment Booked, Memberships, etc.)
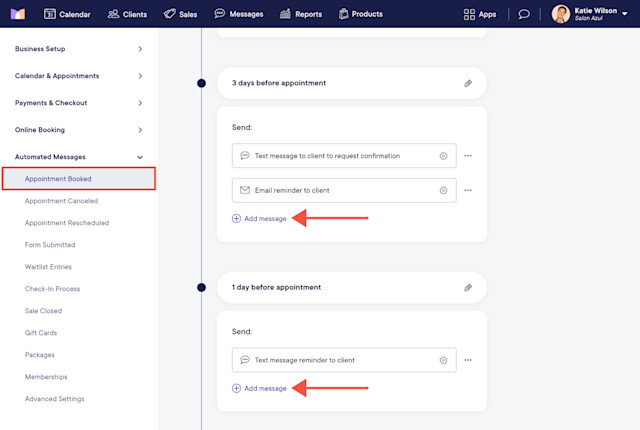
Select Add message to add an automated message.
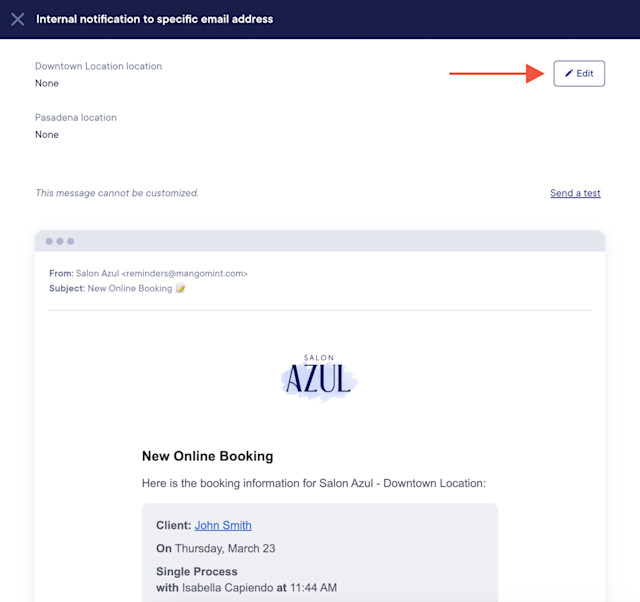
For select messages, you can also add an internal automated message. For example, for Appointment Booked, you can send an email to a specific internal email address to be notified of new online bookings and staff-made bookings.
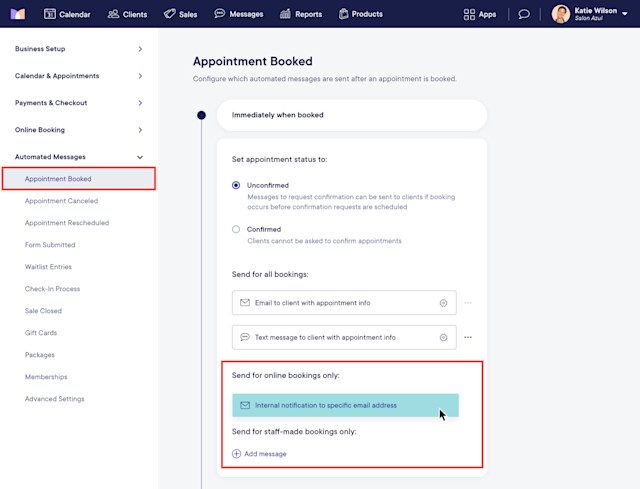
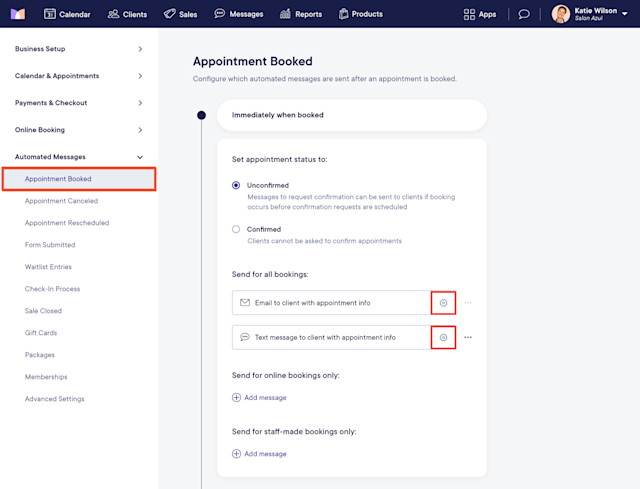
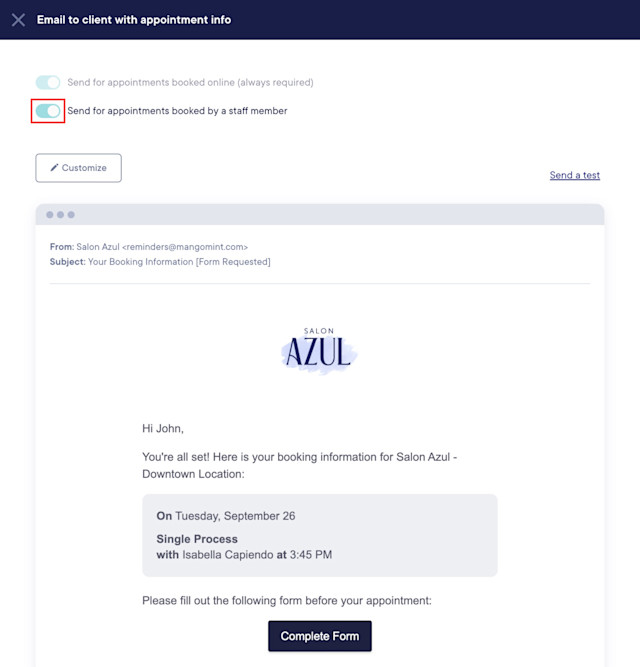
For the Immediately when booked message under Appointment Booked, select the gear icons shown below to send this message when an appointment is booked by a staff member.
Link copiedDisabling automated messagesLink copied
If you disable (delete) an automated message, you can add it back later if needed. The system automatically saves the last version of the automated message (including any custom text that was added) so you can easily restore the message if needed.
To delete an automated message, open the Settings app and select Automated Messages.
Select the automated message category (Appointment Booked, Memberships, etc.)
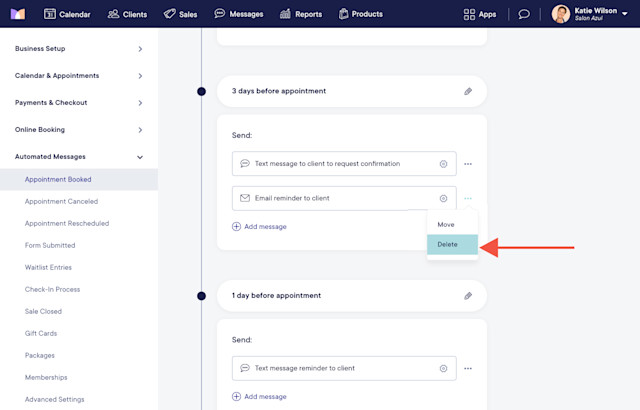
Select Delete from the "..." menu next to the message.
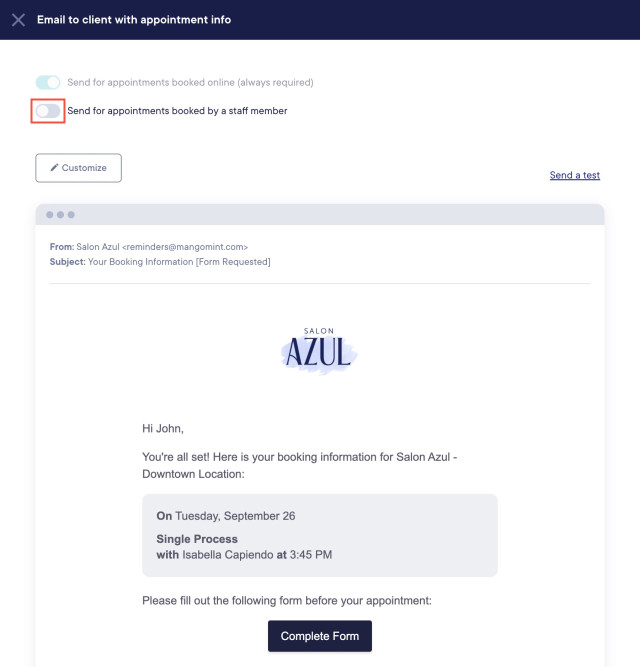
For the Immediately when booked message under Appointment Booked, select the gear icons shown below to disable this message from being sent to clients for appointments booked by a staff member. This can be helpful if you are transferring appointments from a previous scheduling software and need to make sure clients don’t receive notifications as you work through the transfer process.


Can't find what you're looking for?
with us to talk to a real person and get your questions answered, or browse our on-demand videos.