Setting Up Services with Limited Availability
You can use resources to set up services and events that are only available on certain days or during specific times (holiday events, classes, etc).
This article covers:
Link copiedSetting up a service with limited availabilityLink copied
If you set up a service that has limited availability:
The limited availability will apply to all staff members who perform the service.
The limited availability will not affect the availability of any other services.
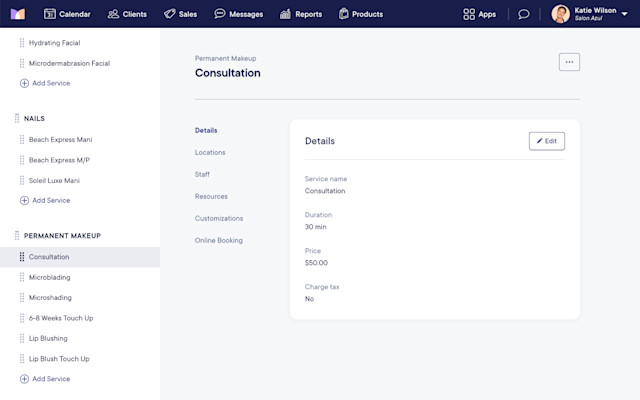
To set up a service with limited availability, create the service in the Services app. In this example, we will set up the service shown below so that it can only be booked on Tuesdays.
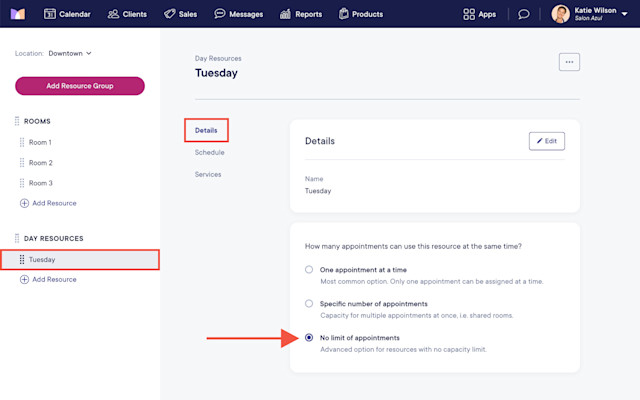
Open the Resources app and create a resource group called Day Resources. Add Tuesday as a resource and select No limit of appointments.
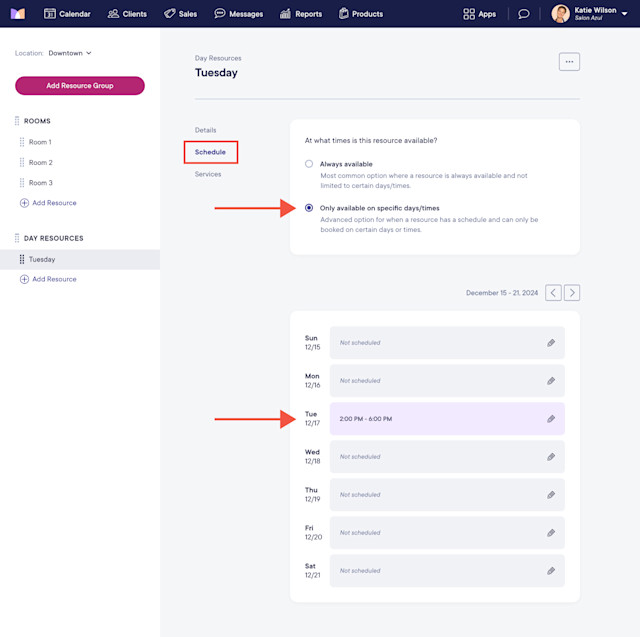
Select the Schedule tab. Select Only available on specific days/times and add a repeating schedule on Tuesdays.
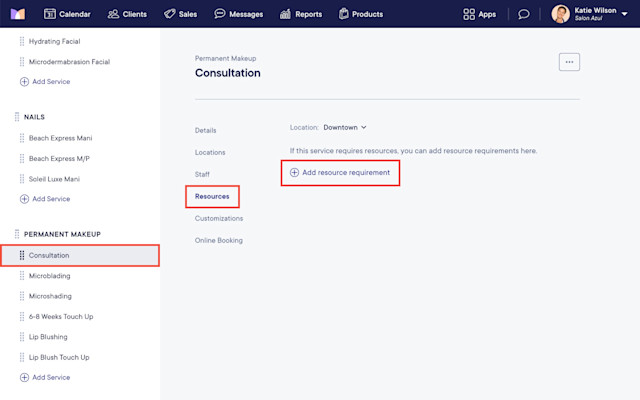
Open the Services app and select the service that is only available on Tuesdays.
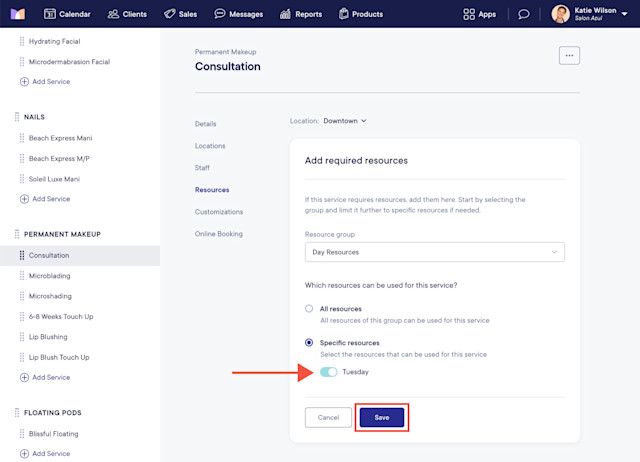
Select the Resources tab and select Add resource requirement.
Select the Tuesday resource and select Save. The service can now only be booked on Tuesdays.
Learn how you can hide the Tuesday resource from the calendar.
Link copiedSetting up an event or class with a capacity limitLink copied
You can set up an event or class that has a capacity limit. For example, you can set up a class and specify that up to 10 clients can attend the class.
To set up an event or class with a capacity limit, create the event or class in the Services app, including adding the duration and price.
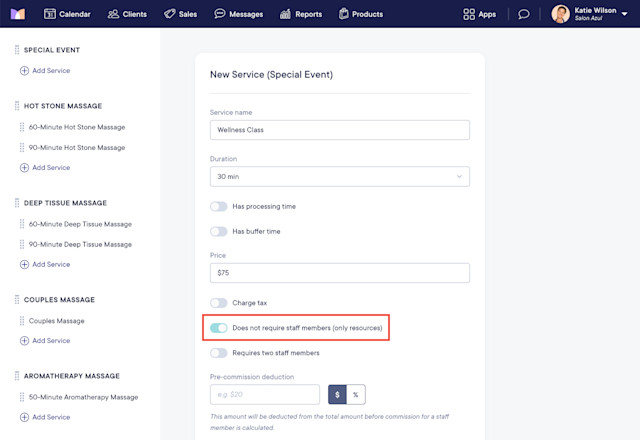
When creating the event, enable the Does not require staff members (only resources) toggle.
When this toggle is enabled, the event will not require a staff member in order to be booked. If you pay commission, you will need to add a pay adjustment for the staff member who performs the event.
To ensure the staff member who performs the event isn’t booked for other services during the event time, you can either remove their regular work hours or add a time block during the event time.
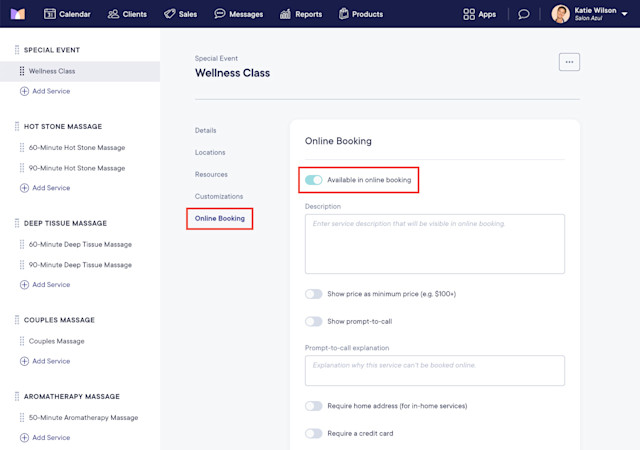
To allow the event to be booked online, enable the Available in online booking toggle.
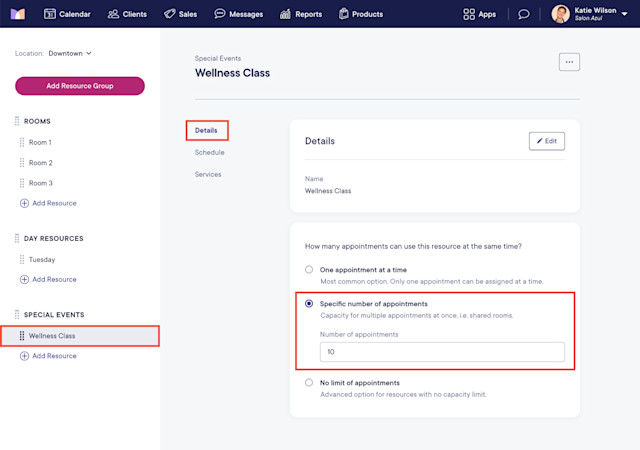
Once the event is created, open the Resources app and create a resource for your event. Select Specific number of appointments and specify the event capacity.
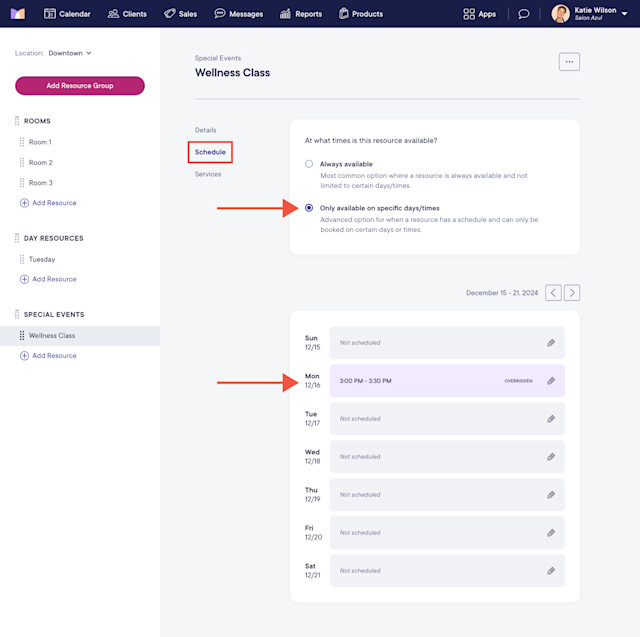
Select the Schedule tab. Select Only available on specific days/times and add the hours when the event is available. These hours must exactly match the event. For example, if the event begins at 3 PM and is 30 minutes, set the hours to 3:00 PM - 3:30 PM.
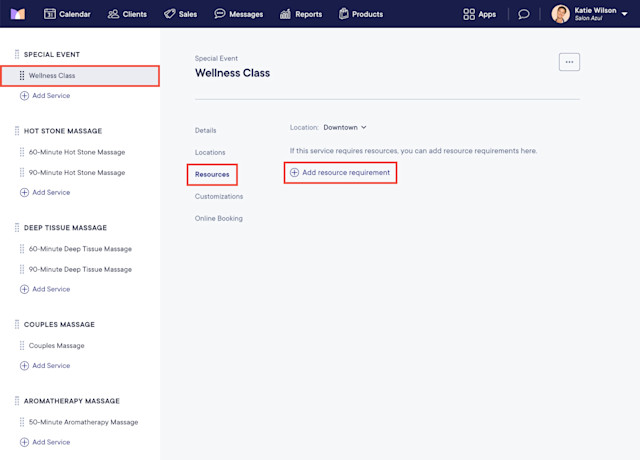
Open the Services app and select the event.
Select the Resources tab and select Add resource requirement.
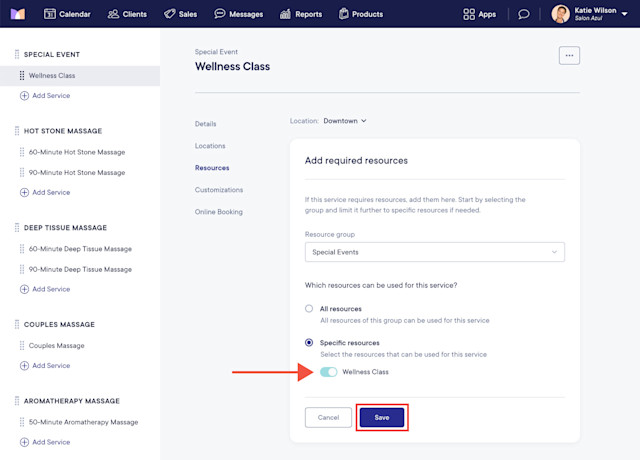
Select the resource you created for the event and select Save. The event can now only be booked for the capacity and time you specified.
Learn how you can hide the event resource from the calendar.

Can't find what you're looking for?
with us to talk to a real person and get your questions answered, or browse our on-demand videos.